Introduction
A RESTful API, also known as a RESTful web service or just REST API, which means Representational State Transfer (REST), is an architectural style and an approach to communications between services that are online & often used in Web Services / Web API development
Way to create login form in ReactJS using secure REST API
1. Create secure REST API
RESTful Web Services API overview (https://www.drupal.org/docs/drupal-apis/restful-web-services-api/restful-web-services-api-overview)
To create login application, we need secure REST API to integrate into the application. So we have used the REST API of Drupal instance for authentication.
By default, the REST module enables the node entity resource for all GET, POST, PATCH, and DELETE operations. You can see these default settings in sites/default/files/config_XXXX/active/rest.settings.yml
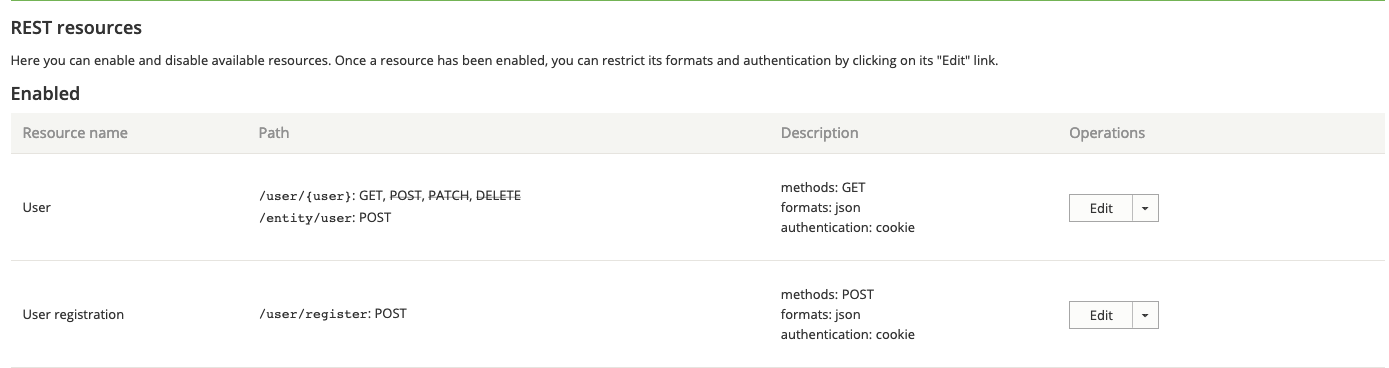
To enable the user entities use https://www.drupal.org/project/restui module. This module provides a user interface for enabling and disabling resources, serialization formats, and authentication providers.
Once module is installed, go on to this link /admin/config/services/rest and enable user entity API. GET method must be enable. You can take a look on below screenshot.

We can use Postman - REST client to test the web services.
Postman is a collaboration platform for API development. Postman's features simplify each step of building an API and streamline collaboration so you can create better APIs—faster. For more info visit https://www.postman.com/
Example:
User login REST API
BaseURL: http://example.com
END POINT:/entity/user?_format=json
Content-Type:application/json
Method:POST
Body:
{
"name" : "admin",
"pass": "myPassword"
}
User Register REST API
BaseURL: http://example.com
END POINT:/user/register?_format=json
Content-Type:application/json
Method:POST
Body:
{
"_links" : {
“type” : {
"href" : "http://example.com/node"
}
},
"name" : {
"value" : "username"
},
"mail" : {
"value" : "example@gmail.com"
},
"pass" : {
"value" : "password"
}
}
2. Setup react application
To Implement the login functionality in react, you need to setup first the react Application
Following link will help you to create basic react application.
https://www.osseed.com/blog/reactjs-create-simple-react-app
3. Create React components like Home, LogIn/Logout
* Home component (Access it with/without login) – It’s a simple component which we can access it with/without user login. By default we’ll open this component.
* Login component (Access it without login only) – Here we will create a login page. So with the help of it we can call the REST API and on successful call we will redirect it on the Dashboard component.
Refer below link if you are not aware about creating routing in react.
Routing in React JS (https://www.cluemediator.com/routing-react-js)
Below are the Demo code to create Login and Home page
For demo purpose we are creating these components in “src” directory.
i: For managing login and logout functionality, we need to use sessionStorage which will help us to manage token and user data.
ii: Integrate sign in API
Let’s integrate the “/user/login” API on the click event of the login button. Refer to the below link if you don’t know how to call API in ReactJS.
API call in React JS (https://www.cluemediator.com/api-call-react-js )
Here, we used fetch method to make API calls and set data into sessionStorage. After successful login, we are storing the response data in sessionStorage and redirect it to the dashboard page. Also managing the loading and error flag via useState.
4. Manage the logout in dashboard
On click of the Logout button, we are removing the data from the sessionStorage and redirect it to the login page. Also we are showing the user name on page of the Dashboard.


