First of all we are going to Install android studio on system https://developer.android.com/studio. As we know Android studio provides programming in Java & Kotlin language.So now we are move on to further step for creating app which displaying current location on google map using kotlin language.
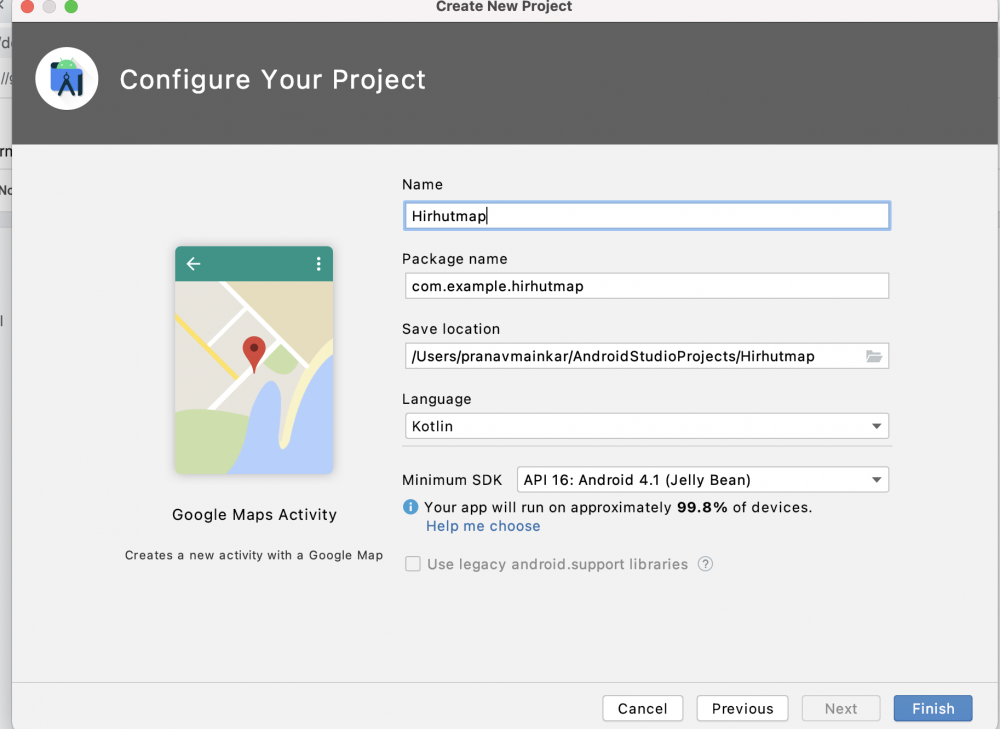
Create a new android project and select Google maps activity.

After that you need to add a project name & select the language which you preferred.Right now we are going to use the Kotlin language to do further development.
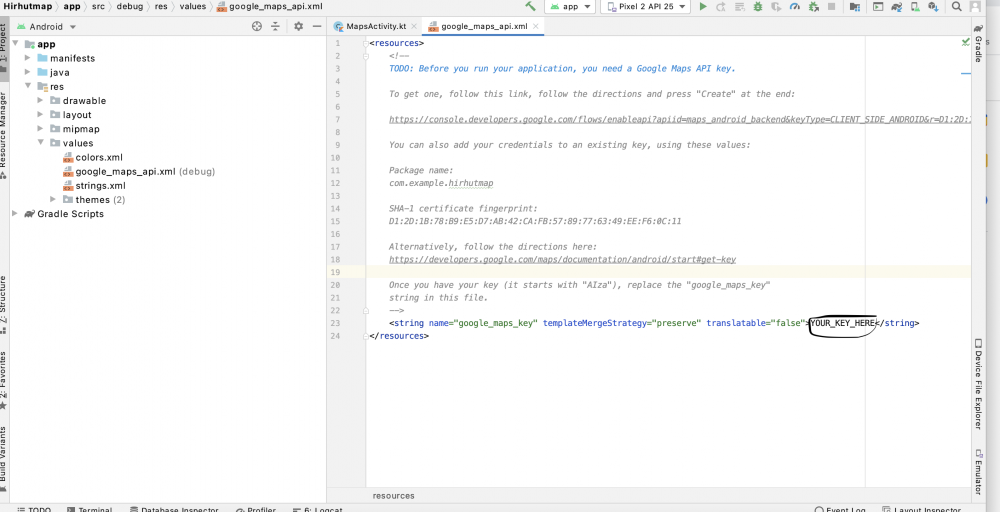
Before we are going to show a map with a specific location with a marker, for that purpose we required a Google Maps API key. We can create an API key follow this link https://console.developers.google.com/flows/enableapi?apiid=maps_android_backend&keyType=CLIENT_SIDE_ANDROID&r=D1:2D:1B:78:B9:E5:D7:AB:42:CA:FB:57:89:77:63:49:EE:F6:0C:11%3Bcom.example.hirhutmap
Also, there is an alternative way https://developers.google.com/maps/documentation/android-sdk/start#get-key
Once you get an API key, copy that key & paste it under the google_maps_api.xml file under the string in this file. eg: Api key starts with “AIza”
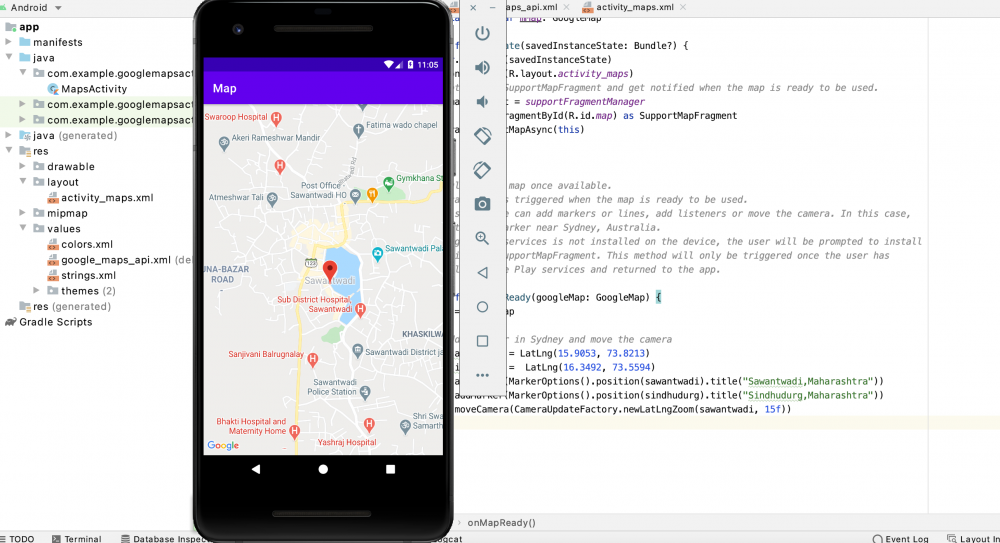
Now we will add Latitude & longitude to display specific locations on the map. You can add your location by adding latitude & longitude under the `MapsActivity.kt` file under the onMapReady function.OnMapReady function which is automatically called when the map is activated on your device or an emulator like the below example.
// Add a marker in Sawantwadi and move the camera
val Sawantwadi = LatLng(15.9053, 73.8213)
mMap.addMarker(MarkerOptions().position(Sawantwadi).title("Sawantwadi,Maharashtra").icon(BitmapDescriptorFactory.defaultMarker(BitmapDescriptorFactory.HUE_GREEN)))
mMap.moveCamera(CameraUpdateFactory.newLatLng(Sawantwadi))
If you want to change the color of the marker on the map,then just add following code after addmarker method :
.icon(BitmapDescriptorFactory.defaultMarker(BitmapDescriptorFactory.HUE_GREEN)))
Also if you want to change the marker icon on a map you need the first download the specific image format file like jpg etc & add that file under res/drawable folder. After that add the following line of code.
.icon(BitmapDescriptorFactory.fromResource(R.drawable.marker))
Eg: mMap.addMarker(MarkerOptions().position(Sawantwadi).title("Sawantwadi,Maharashtra").icon(BitmapDescriptorFactory.fromResource(R.drawable.marker))
If you want to zoom the map with the following specific levels
1: World, 5: Landmass/continent, 10: City, 15: Streets and 20: Buildings
Just need to add the following line & replace the level as you want like 15f,10f, etc. so the zoom effect will be displayed on specific streets, buildings levels only. If you notice that what we did just replaced the function newLatLng with newLatLngZoom to get that effect.
mMap.moveCamera(CameraUpdateFactory.newLatLngZoom(Sawantwadi,15f))
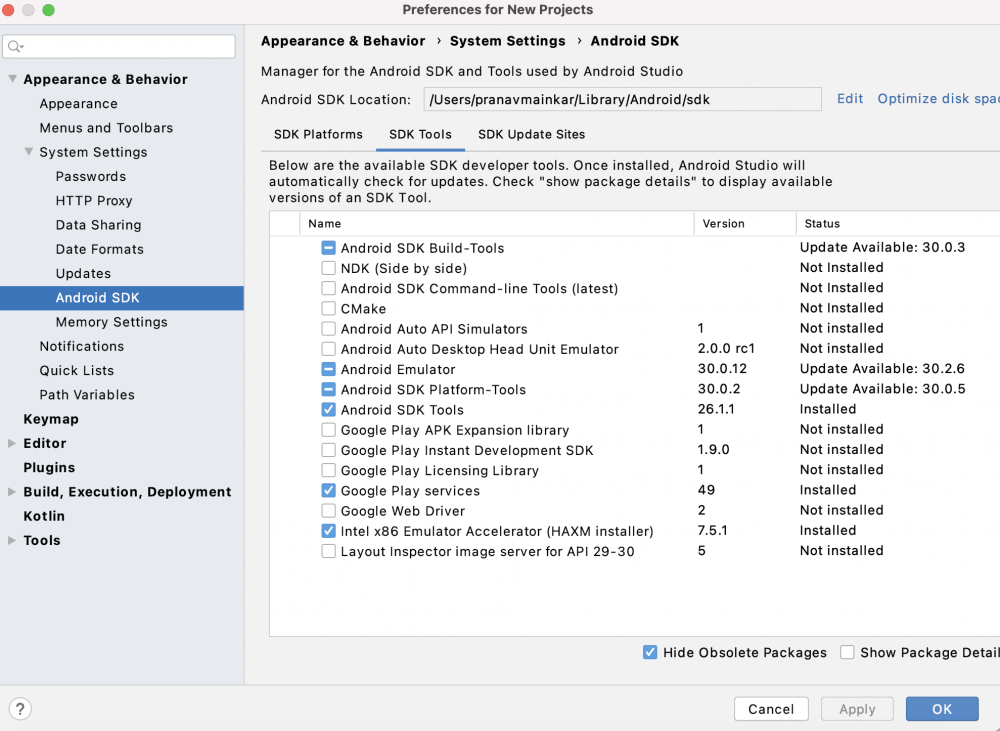
You need to check first `google play services` are installed on your device or not. If not then you need to add Google Play services to Android Studio from SDK manager tools.
Once all procedures are done run the app you will get a required map with a location on your device or else you can test that app on AVD manager which creates virtual devices.